For those of you who have ever done a home remodeling project, I feel your pain. While the outcome is often rewarding, the process can be long and daunting. A great deal of decision-making and hoping not to make costly mistakes.
As an interior designer, not only is it my job to design and collaborate with the client, but I also experience what it’s like through the remodeling projects vicariously.
My biggest advice is never to rush. Thoughtful planning, time to think through decisions, plenty of time for purchasing, and all the mishaps that happen (long lead times, broken / lost items, ….oh so many things!). And plan for contingencies… things always seem to take longer and end up being more expensive, unfortunately.
I’m looking forward to featuring the process of some of my projects here, as well as welcoming the opportunity to take your submissions and provide feedback on your projects as well. If you are interested in design or remodeling advice, I have included information here about submitting your project for design advice.
Here’s my typical step by step process for approaching design projects:
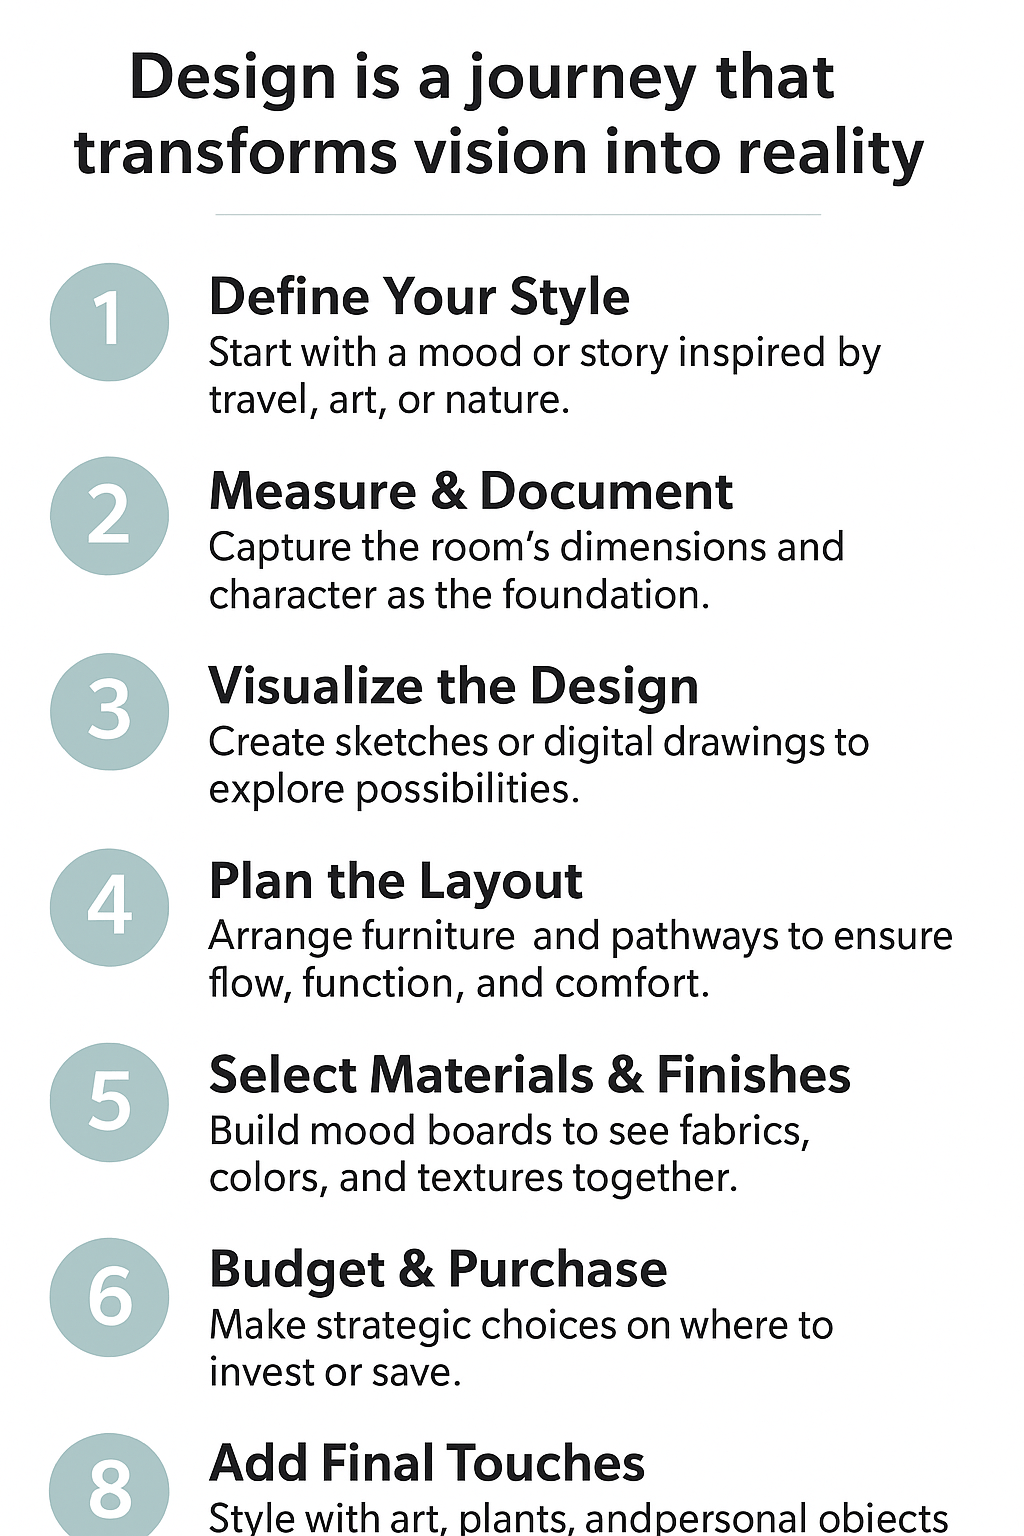
Step 1: Concepts – Defining a Style
Every beautiful room begins with a vision. Think of this step as writing the story of your space—what mood do you want it to evoke? Is it calm and serene, bold and dramatic, or timeless and classic? Gathering inspiration from travel, nature, art, or your favorite interiors helps create a design style that feels authentic to you.
Step 2: Measure & Photo
Even dream spaces need a foundation. By capturing measurements and photos, you’re not just collecting numbers—you’re honoring the architecture and character that already exists. These details become the canvas for your creativity, giving you the freedom to dream while staying grounded in what’s possible.
Step 3: Design Drawings
This is where vision takes shape. Rough sketches or digital drawings allow you to imagine how the space could look once transformed. It’s a moment of possibility—lines on paper that hold the promise of comfort, beauty, and function.
Step 4: Space Planning & Layout Development
Design isn’t just about how things look—it’s about how a space feels when you move through it. In this step, the room becomes a choreography of furniture, pathways, and light. A thoughtful layout makes a space flow effortlessly, where every corner has a purpose and every view feels intentional.
Step 5: Selections & Presentation Boards
Now the soul of the design comes alive. Fabrics, finishes, colors, and textures tell the story you began in Step 1. Mood boards let you see it all together—the shimmer of metal, the softness of textiles, the warmth of wood. It’s the moment when your ideas start to feel real, almost touchable.
Step 6: Budget & Purchasing
Even creativity needs structure. A well-planned budget gives you freedom to dream without worry. This step is about making thoughtful choices—deciding where to invest in timeless pieces, and where to save with smart finds. Purchasing becomes the act of turning vision into reality, piece by piece.
Step 7: Hiring Professionals
Behind every stunning interior is a team who brings it to life. From skilled contractors to artisans and tradespeople, these professionals help transform your vision with precision. Choosing the right team is less about transactions and more about collaboration—a shared commitment to beauty and quality.
Step 8: Final Touches
The magic happens here. A room becomes more than walls and furniture when you add art, books, plants, and objects that tell your story. These finishing touches create atmosphere, warmth, and personality. They whisper who you are, turning a designed space into a lived-in sanctuary.
Conclusion
Design is not a straight line—it’s a journey of discovery. From the spark of an idea to the final styling, each step reveals a piece of the story your home wants to tell. When complete, the result isn’t just a beautiful space—it’s a reflection of your life, your taste, and the moments you want to create within it.
Subscribe for free design advice: https://yourdesignguide.design.blog/

